Hey guys!
I have been asked how I finish my Brooke's Books Advent Animals so I thought I would do a little tutorial so show the step by step process.
Here is everything I used to make the ornament (My 3 year old got a hold of my tape measure, I am sure you know what happened next and why it looks like it does now.)
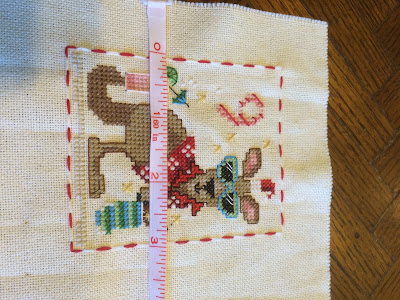
First you need to measure your stitching. For these ornaments I don't want any extra fabric showing on the sides so I measure right to the edges of the stitching.
Then I use a paper cutter to cut the cardboard. It is just a piece of cardboard I had laying around, nothing fancy. And you could use whatever to cut the cardboard I just like how straight and neat of a job the paper cutter does.
Next add a bit of glue. You could lace your stitching if you don't like gluing.
The glue is pretty forgiving so after you glue the flaps to the back you can push it around a bit to get it straightened on the front if it needs it. I try to keep my thumbs on my stitching and my other fingers on the glue part any time I touch the ornament so I don't get any glue on the stitched area.
I also trim the corners so it isn't so bulky when I glue the opposite flaps. You can also see on the bottom how I have pushed the fabric in to make the corners pointy when I fold the flap up to glue it.
I add the hanger before I glue the felt on.
Position it on the felt, trim around and your ornament is finished and good to go as soon as the glue dries.
I hope this has been helpful!
Let me know if you have any questions :)
Happy Stitching!


Great tutorial and your ornament looks great. Thanks for taking the time to do this, tutorials are very time consuming to put together.
ReplyDeleteThank you! Your right! The most time consuming part might have been taking pictures with one hand haha!
DeleteThank you!!!!!
ReplyDeleteYou are very welcome Vickie! I hope this was of some help to you :)
Delete